
You can fix a running toilet yourself in under an hour, usually for less than the cost of a takeaway, because the problem is almost always one of three cheap parts inside the tank: the flapper, the float, or the fill valve. None of them require tools beyond your hands and maybe a pair of pliers, and none of them involve touching the actual plumbing in the wall. If you can change a lightbulb, you can do this.
First, the safety step, and please don’t skip it. Before you adjust or replace anything, turn off the water supply valve. It’s the small oval or football-shaped handle on the wall or floor behind the toilet, connected by a hose to the bottom of the tank. Turn it clockwise until it stops. Now nothing can overflow or spray while you work, and if anything feels stuck or you get out of your depth, you can simply turn it back on and walk away with nothing broken. Renters, this also means you can investigate safely before deciding whether to call the landlord.
A constantly running toilet wastes a shocking amount of water, sometimes hundreds of liters a day, so this fix often pays for itself on the next water bill.
Step 1: Open the Tank and Watch What’s Happening
Lift the lid off the tank (called the cistern in the UK) and set it somewhere safe on a towel, because ceramic lids crack easily on hard floors. Flush the toilet with the water still on and just watch. The tank water is clean, by the way, it’s the same water that comes out of your taps, so don’t be squeamish about it.
You’re looking at three main characters:
- The flapper (or flush valve seal): a rubber disc at the bottom of the tank that lifts when you flush and drops back to seal the tank.
- The float: a plastic ball on an arm, or a cup that rides up and down the fill valve, which tells the water when to stop filling.
- The fill valve: the tower on the left that refills the tank, with an overflow tube nearby.
Whichever one is misbehaving will usually show itself within a minute of watching.
Step 2: Do the Dye Test to Confirm a Leaky Flapper
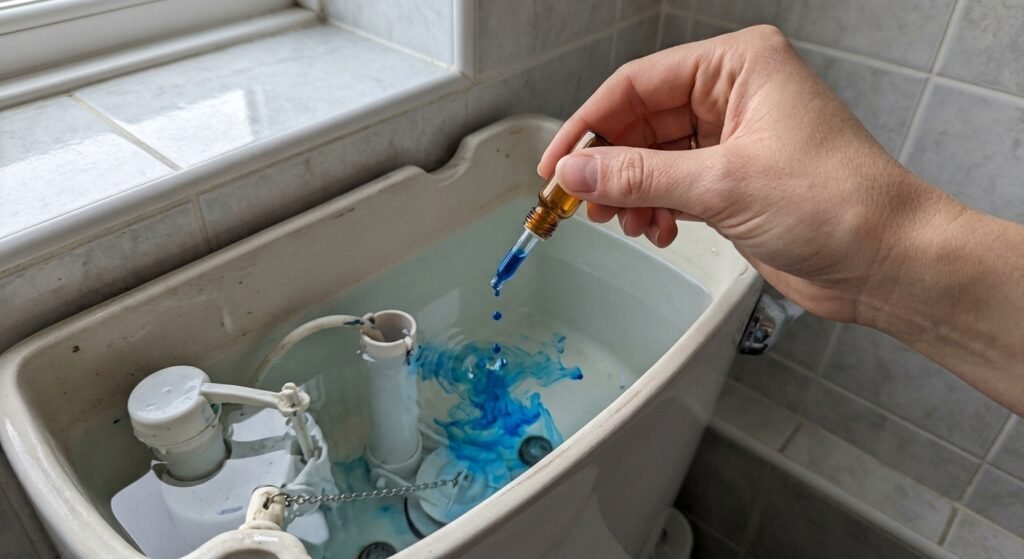
The flapper is the culprit in most running toilets. Rubber hardens, warps, or gets a coating of mineral gunk, and then it can’t seal, so water constantly trickles into the bowl and the fill valve keeps topping up.
Here’s the classic test. Put a few drops of food coloring into the tank water and wait 15 minutes without flushing. If color shows up in the bowl, the flapper is leaking. That silent trickle is your running toilet.
Sometimes the fix is embarrassingly simple: the chain connecting the flush handle to the flapper is too tight or has looped under the flapper, holding it slightly open. Give the chain a little slack, about one or two links of droop, and check nothing is caught underneath.
Step 3: Clean or Replace the Flapper
With the water valve off, flush to empty the tank. Now you can work with dry hands.
Try cleaning first. In hard water areas, flappers often stop sealing because of mineral crust on the rubber or on the ring it seats against. Unhook the flapper, wipe it and the seat with a cloth and some white vinegar, and reinstall. If limescale is a recurring theme in your bathroom, the same buildup is probably on the porcelain too, and our guide on how to remove hard water stains from toilet bowls handles that side of things.
If the rubber is stiff, warped, or cracked, replace it. A universal flapper costs a few dollars at any hardware shop. Unhook the old one from the pegs on the overflow tube, unclip the chain, and take it with you to the shop to match the size, since there are two common sizes. The new one clips on the same way in about two minutes. Turn the water back on, let the tank fill, and repeat the dye test to confirm the fix.
Step 4: Adjust the Float if Water Runs Into the Overflow Tube
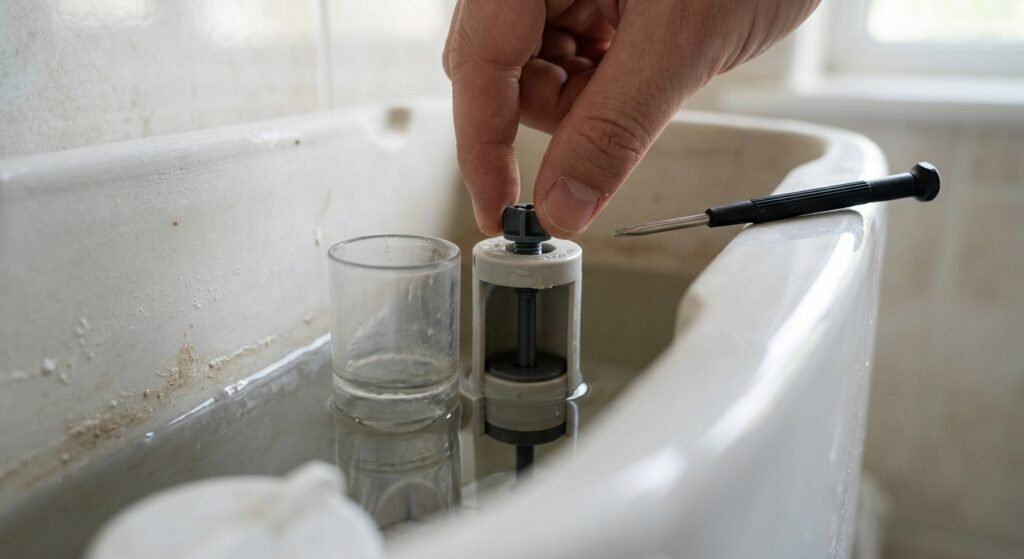
If you watched the tank and saw water rising until it spilled into the top of the open overflow tube, the flapper is innocent. The float is set too high, so the tank overfills forever.
The fix is a small adjustment:
- Cup-style float: pinch the clip on the side and slide the cup down a little, or turn the adjustment screw on top counterclockwise a few turns.
- Ball-and-arm float: turn the screw where the arm meets the valve, or on older ones, gently bend the metal arm downward slightly.
Aim for a water level about 2 to 3 centimeters (an inch) below the top of the overflow tube. Flush, let it refill, and check. It sometimes takes two or three small adjustments to land in the right spot, which is normal, not a sign you’re doing it wrong.
Step 5: Replace the Fill Valve if It Never Shuts Off
If the water level is fine and the flapper passes the dye test but the fill valve hisses, sputters, or cycles on and off by itself, the valve mechanism is worn out. Replacements are cheap, universal, and come with instructions in the box, but the short version:
- Water off at the valve, flush, then sponge the last of the water out of the tank.
- Put a small towel or tub under the tank, unscrew the supply hose from the base of the fill valve, and undo the plastic lock nut under the tank. Hand-tight plus pliers for the last bit is all it takes.
- Lift the old valve out, drop the new one in, and reverse the steps. Hand-tighten the nut and hose snugly, no serious force, because overtightening cracks plastic threads.
- Water back on, check for drips under the tank, set the float height.
The whole swap takes 20 to 30 minutes the first time. It’s honestly one of the most satisfying beginner repairs there is, and it belongs on the same list as the quick wins in our roundup of easy home repairs for renters.
When to Stop and Call Someone
Know your limits, especially in a rental. Call the landlord or a plumber if the shut-off valve won’t turn or is leaking, if water is coming from anywhere outside the tank, if the tank itself is cracked, or if the toilet runs on even after a new flapper and fill valve. Everything inside the tank is fair game for a beginner. Anything involving the supply line fittings behind the wall or a corroded valve is not worth forcing, because a snapped valve turns a free fix into an emergency callout.
FAQs
How do I know if my toilet is running when I can’t hear it?
Do the food coloring test. Drops in the tank, wait 15 minutes, look in the bowl. A lot of running toilets are silent trickles you’d never hear, and the dye test catches them instantly. If you notice ripples in the bowl water when nobody has flushed, that’s the same leak showing itself.
Is it safe to do this in a rental, or will I get in trouble?
Adjusting a chain, cleaning a flapper, or tweaking a float is routine maintenance, and no reasonable landlord objects to it. For part replacements, it’s worth a quick message to the landlord first, partly to be safe and partly because they should be paying for parts. And since you shut off the water valve before touching anything, there’s no scenario where you flood the place.
Why does my toilet run for a few seconds randomly, then stop?
That’s called phantom flushing, and it’s a slow flapper leak. The tank loses water drip by drip until the level falls enough for the fill valve to kick in for a few seconds. It feels ghostly at 3 a.m. but the fix is boring: clean or replace the flapper.
How much water does a running toilet actually waste?
A lot more than the sound suggests. A moderate leak wastes a couple hundred liters a day, and a badly running toilet can dump over a thousand. If you’re on a water meter, a running toilet is often visible on the very next bill, which is also a good way to prove to a slow-moving landlord that it needs fixing.
The handle sticks and the toilet runs until I jiggle it. Same problem?
Close cousin. A sticking handle or a too-short chain holds the flapper open, so the tank never seals. Loosen the handle’s mounting nut slightly inside the tank if it binds, and give the chain a link or two of slack. The jiggle fix works because it lets the flapper finally drop, so make that happen on its own.