
The best renter friendly backsplash is peel-and-stick tile: it goes up in an afternoon with a utility knife and a level, costs a fraction of real tile, and comes off cleanly when you move out if you prep the wall right and remove it with heat. That last part matters as much as the installation, so this guide covers the whole life cycle, including the two spots that trip everyone up: cutting around electrical outlets and getting the first row perfectly straight.
Peel-and-stick has come a long way from the flimsy sticker sheets of a decade ago. Modern versions come in vinyl “gel” tiles with real dimensional texture, thin actual-stone veneer, and glossy faux-subway finishes that photograph surprisingly well. From arm’s length, a good vinyl subway tile passes for the real thing. Up close and at a raking angle you can tell, but nobody inspects a kitchen wall that way except you.
Picking the Right Peel-and-Stick Tile
Three broad types, in rising order of price:
- Vinyl gel tiles (also sold as “3D” or “epoxy” tiles). Flexible sheets with raised, cushioned tile shapes. Cheapest, easiest to cut with scissors, most forgiving on slightly imperfect walls. The best choice for most rentals.
- Rigid composite or PVC panels. Stiffer, flatter, more convincing gloss. They need a sharper knife and a straighter wall, but the finished look is a step up.
- Real stone or metal veneer. Thin slices of actual stone or aluminum on adhesive backing. Beautiful, heavy, and the adhesive is aggressive. Think hard before putting these in a rental, because removal is where they punish you.
Whatever you pick, buy 10 to 15 percent extra for cuts and mistakes. Also check the heat rating. Most vinyl tiles are fine near a stove but shouldn’t sit directly behind a gas burner with no gap. The packaging states a minimum distance, usually around 40 cm or 16 inches from an open flame.
Prep: The Step That Decides Everything
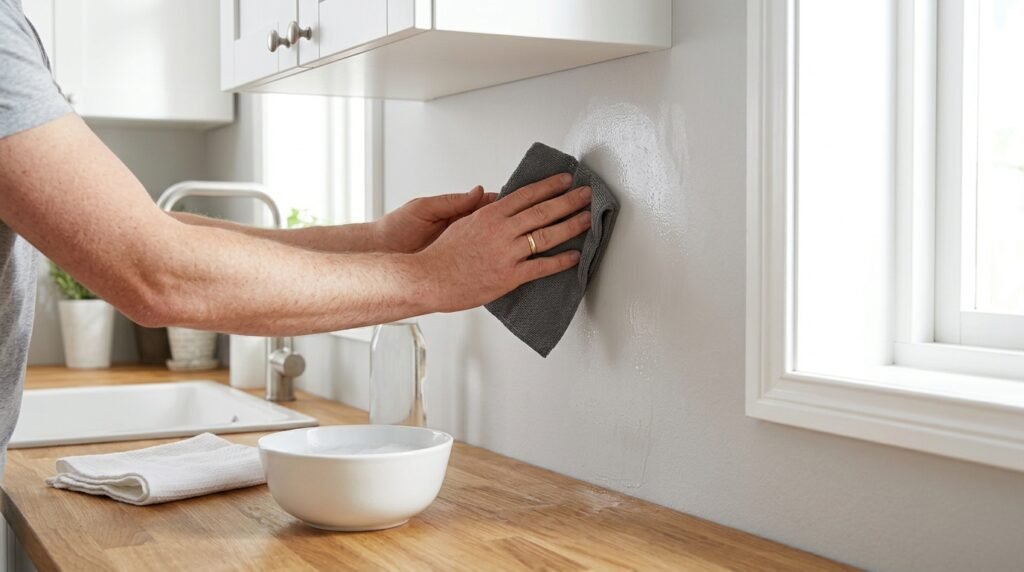
Adhesive tiles hold to the wall exactly as well as whatever’s on the wall holds to itself. That sentence is the whole game.
- Degrease properly. Kitchen walls behind a counter carry an invisible grease film even if they look clean. Wash with warm water and a squirt of dish soap, then rinse with plain water and dry. Behind a stove you may need two passes. It’s the same film that builds up on cabinet doors, and the same cleaning approach works: How to Get Cooking Grease Off Painted Cabinets.
- Let the wall dry completely. At least an hour. Adhesive on a damp wall fails in weeks.
- Check the paint. Press a strip of masking tape onto the wall and rip it off. If paint comes with it, the paint layer is weak, and peel-and-stick will eventually pull paint off in sheets. On flaky or fresh paint (less than four weeks old), don’t tile. This is genuinely the most common cause of both failed tiles and lost deposits.
- Fill big holes, sand bumps. The tiles telegraph every lump. Small imperfections disappear under gel tiles; rigid panels forgive nothing.
Cold rooms are the sneaky failure mode. Adhesive bonds poorly below about 15°C (60°F), so warm the room up before you start, and press each tile firmly for a few seconds rather than just patting it on.
Installation: Getting It Straight
- Find your starting line. Don’t trust the countertop to be level, because in older buildings it often isn’t. Use a spirit level to draw a light pencil line one tile-height above the counter’s lowest point, and align your first row to the line, not the counter. Any small gap at the counter gets hidden later with a bead of removable caulk or simply left, since it sits below eye level.
- Start from the most visible corner or the center of the main wall, so any cut slivers end up in the corners where nobody looks.
- Peel the backing gradually, not all at once. Peel the top few inches, place the top edge on your line, then smooth downward while peeling the rest. Full-sheet placement in one go is how you get trapped air and crooked rows.
- Overlap or butt the seams as the manufacturer says. Gel tiles usually overlap a few millimeters on molded edges so the seam vanishes. Rigid tiles butt tightly. Mixing up the two methods makes seams obvious.
- Press, then press again. Go over the whole wall with a flat hand or a soft cloth once finished, and again the next day. Adhesive keeps curing for around 48 hours.
Cutting Around Outlets (The Part Everyone Dreads)
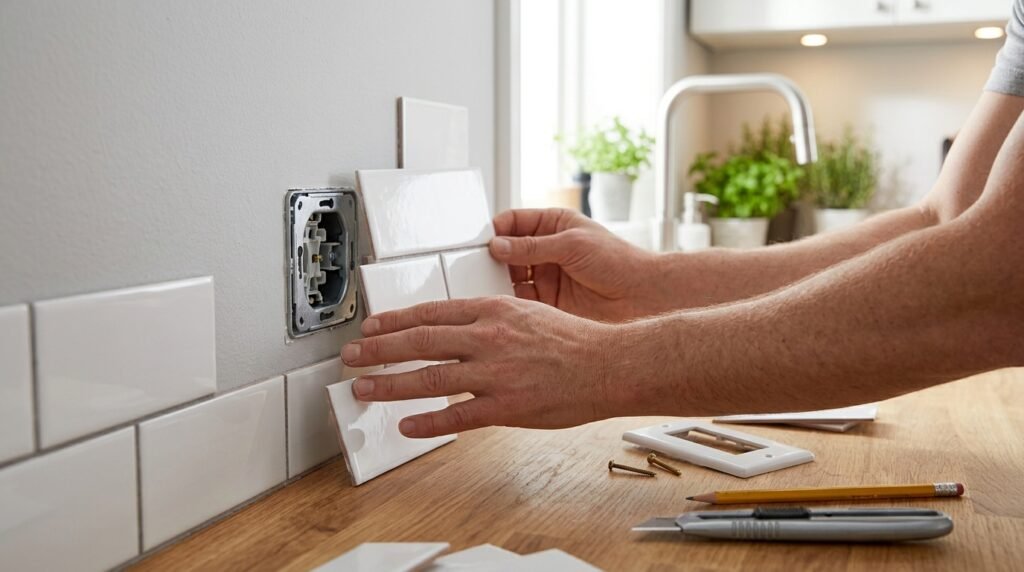
Outlets look scary and aren’t, as long as you cut the hole slightly small rather than slightly big. The faceplate covers a small hole; nothing covers a big one.
- Kill the power at the breaker and unscrew the outlet faceplate. Two minutes, and it turns a fiddly cut into an easy one, because the tile can now slide behind where the plate will sit.
- Measure to the outlet box, not the plate. Measure from your last placed tile to the edges of the plastic box in the wall and transfer those marks to the back of the new tile. Double-check by holding the tile in place and marking directly. Trust the held-up marks over the measured ones when they disagree, which they will.
- Cut the opening about 5 mm (1/4 inch) inside your marks, test the fit, and trim outward little by little. Scissors handle gel tile; rigid tile wants several scoring passes with a fresh utility knife blade rather than one forced cut.
- Screw the faceplate back on over the tile. The plate hides the cut edges completely. If the tile is thick, the faceplate screws may need a longer replacement, which hardware stores sell for pennies. Some thick tiles also need outlet spacers, little plastic shims that bring the outlet flush with the new surface, and they’re a standard cheap part too.
A note from the school of hard knocks: cut outlets as you reach them, one at a time. Pre-cutting all your outlet tiles in one measuring session multiplies every small error across the whole wall.
Removing It When You Move Out
Do this slowly and warm, never fast and cold.
- Warm each tile with a hairdryer for 30 to 60 seconds until the adhesive softens.
- Lift a corner with a plastic scraper or an old credit card, then peel back low and slow, keeping the tile folded almost flat against the wall rather than yanking outward.
- Rub off leftover adhesive with more heat and a cloth. Stubborn residue comes off with a little cooking oil or a citrus adhesive remover, followed by a soapy wash so the wall isn’t oily.
- Wash the whole area and check the paint. Done properly on sound paint, the wall looks untouched.
If you’re doing a whole rental spruce-up before an inspection, adhesive residue tends to lurk on window frames and furniture too. Same chemistry, same fix: How to Remove Sticker Residue from Wood.
FAQs
Will peel-and-stick tile damage my walls when I remove it?
On sound, well-cured paint, no, as long as you use heat and peel slowly. Where people get burned is sticking tile over cheap builder-grade flat paint or fresh paint, because the tile bonds better than the paint does and the paint loses. Do the masking-tape test first and you’ll know your risk before committing a whole wall.
Can I put peel-and-stick tile behind the stove?
Behind an electric or induction stove, yes, most products handle that heat fine. Behind a gas hob you need to respect the product’s stated clearance from open flame, usually around 16 inches. If the tile would sit closer than that, use a stainless or glass splash panel for that one section and tile around it.
Does it survive steam and splashes near the sink?
Good vinyl tile is waterproof on its face, and splashes wipe right off. The weak point is the seams and edges, where steady water intrusion can lift corners over time. Press seams down well during install and wipe up standing water rather than letting it sit along the counter joint. A thin bead of clear removable caulk along the bottom edge solves it completely.
How much does a renter friendly backsplash cost?
For a typical kitchen run of around 3 to 4.5 square meters (30 to 50 square feet), budget roughly $40 to $120 in vinyl gel tile, or two to three times that for rigid panels or stone veneer. Compare that with real tile at several hundred dollars plus tools, plus a landlord conversation you probably don’t want to have.
Can I stick it over existing ceramic tile?
Yes, and it actually holds better on glazed tile than on paint, since there’s no paint layer to fail. Clean and degrease thoroughly, and aim your seams so they don’t land exactly on the grout lines, which can show through thin vinyl as faint ridges. Deep grout lines under thin tile may need a skim of filler first, or just pick a thicker gel tile that bridges them.