
You can absolutely grow tomatoes in pots on a balcony, and homegrown tomatoes taste so much better than supermarket ones that people get slightly evangelical about it. You need three things: at least six hours of sun, a big enough pot, and a watering habit you can actually stick to. Get those right and everything else is detail.
This guide walks through the whole season step by step, from picking a variety to picking fruit, written for someone who has never grown a tomato in their life.
Step 1: Check Your Sun Before Anything Else
Tomatoes are sun addicts. Six hours of direct sun a day is the realistic minimum, and eight is better. South-facing balconies (north-facing in Australia) are ideal. East or west can work. A balcony that only gets a couple of hours of direct light will grow a leafy plant with very few tomatoes, and no amount of feeding fixes that.
Spend one sunny day checking your balcony every couple of hours and note where the light actually falls. The sunniest spot might be one specific corner, and that corner is where the tomato lives. If your balcony genuinely doesn’t get the light, don’t force it. Leafy greens and shade-tolerant herbs will reward you far more, and our guide to the best vegetables for container gardening has options for less sunny spots.
Step 2: Pick a Variety Bred for Pots
This choice matters more than beginners realize. Tomato varieties come in two basic growth habits:
- Bush (determinate) varieties grow to a fixed size, fruit in one main flush, and need little pruning. These are the balcony-friendly ones.
- Vining (indeterminate) varieties keep growing all season, easily past two meters, and need serious support and regular pruning. Doable in pots, but not the easy route.
For a first season, choose a bush or dwarf cherry variety. Cherry tomatoes ripen faster, cope better with uneven watering, and give you a steady trickle of fruit instead of one big harvest. Look for words like “bush,” “dwarf,” “patio,” or “tumbling” on the label. Tumbling types even grow happily in hanging baskets or railing planters if floor space is tight.
One plant is plenty to start with. Seriously. A single healthy cherry tomato in a big pot will outproduce three cramped ones.
Step 3: Get a Big Pot, Then Go Bigger
The most common reason balcony tomatoes fail is a pot that’s too small. Small pots dry out in hours, starve the roots, and produce sad, stressed plants.
Minimum sizes that actually work:
- Dwarf and tumbling varieties: 20 to 25 liters
- Bush varieties: 30 to 40 liters
- Vining varieties: 40 liters or more
If those numbers mean nothing to you, think “bucket at the absolute minimum, and ideally something you wouldn’t want to carry when full.” Plastic pots hold moisture longer than terracotta, which is an advantage for a thirsty plant. Drainage holes are non-negotiable.
Fill it with fresh quality potting mix, never garden soil and never last year’s tired compost from another pot. Tomatoes are heavy feeders and old soil is both depleted and a disease risk.
This is also where a self watering planter earns its keep. Tomatoes are the single best use case for them, because the steady moisture prevents both split fruit and blossom end rot. We’ve broken down the pros, cons, and a free DIY version in are self watering planters worth it.
Step 4: Plant Deep and Add Support on Day One
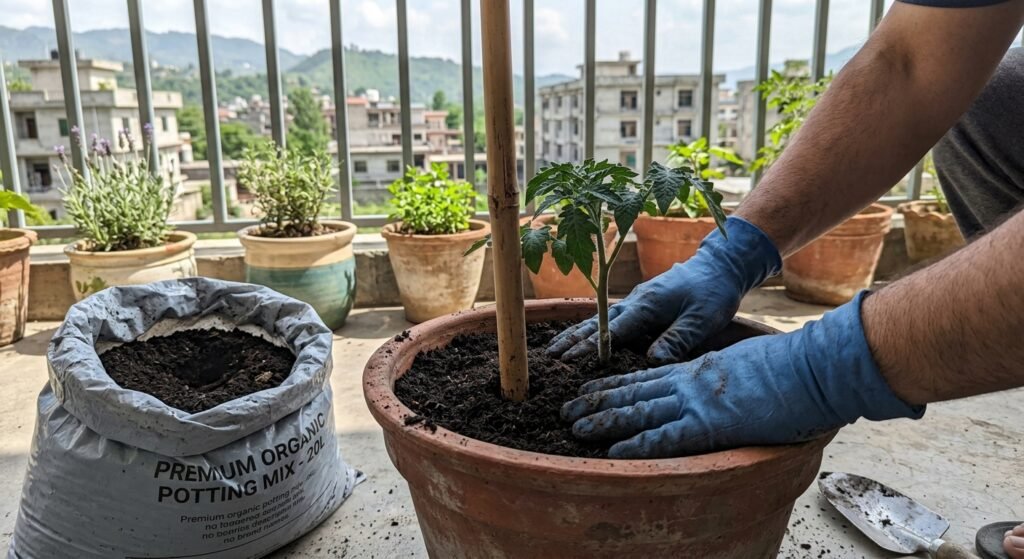
Buy a stocky young plant from a garden center in mid to late spring, after the last frost in your area. Skip seed starting for your first year. It’s cheap but it adds six weeks and several new ways to fail.
When you plant, bury the stem deeper than it sat in its original pot, right up to the first set of true leaves. Tomatoes grow roots from the buried stem, which gives you a stronger, more drought-resistant plant. It feels wrong the first time. Do it anyway.
Push a sturdy stake or tomato cage into the pot at planting time, not later when the roots have filled the pot. Even bush varieties get heavy when loaded with fruit. Tie the stem loosely to the stake with soft ties as it grows. On an exposed balcony, wind is a real threat to a tall plant in a pot, so put the tomato in your most sheltered sunny spot and read our fixes on how to protect balcony plants from wind if gusts are a regular thing.
Step 5: Water Like It’s Your Job (Because It Is)
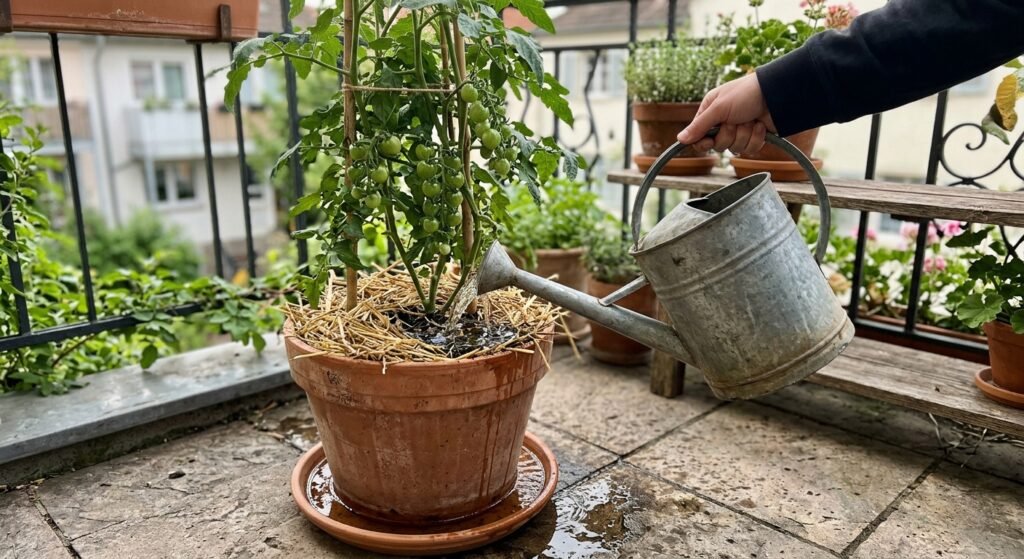
Here’s the honest part: from midsummer on, a tomato in a pot usually needs water every day, sometimes twice a day in a heatwave. This is the actual commitment you’re signing up for. The plant will forgive most other mistakes, but not a week of drought.
The rules that matter:
- Water deeply until it runs from the drainage holes, not little splashes.
- Aim at the soil, not the leaves. Wet leaves invite disease.
- Keep moisture consistent. Cycles of bone dry then flooded cause fruit to split and encourage blossom end rot, that ugly black patch on the bottom of fruit.
- Mulch the top of the pot with a layer of bark or straw to slow evaporation.
Mornings are the best time to water. If you’re not sure whether your instincts are right, the finger test and the other checks in our guide on how often to water container plants apply doubly to tomatoes.
Step 6: Feed Regularly Once Flowers Appear
Potting mix feeds a tomato for roughly the first month. After that, you’re the food supply. Once the first flowers show, start feeding weekly or fortnightly with a liquid tomato feed, following the dilution on the bottle. Tomato feeds are high in potassium, which pushes the plant toward fruit instead of endless leaves.
Two signals worth knowing: pale yellowing lower leaves usually mean the plant is hungry, and masses of lush foliage with no flowers can mean it’s getting the wrong food, typically something too high in nitrogen.
Step 7: Light Pruning and a Little Patience
Bush varieties barely need pruning. Remove any leaves touching the soil and any that yellow, and that’s mostly it. If you chose a vining variety, pinch out the small side shoots that appear in the joint between a leaf and the main stem, and pinch the top of the plant once it reaches the top of its support.
Flowers usually appear four to six weeks after planting, and the first ripe cherry tomatoes six to eight weeks after that. There’s a stretch in early summer where nothing seems to happen at all. That part just takes patience.
Pick fruit when it’s fully colored and comes off with a gentle twist. Picking regularly tells the plant to keep producing. And never put homegrown tomatoes in the fridge, because it kills the flavor you grew them for.
FAQs
How many tomatoes will one potted plant actually give me?
A happy cherry tomato in a 30 liter pot typically produces a few hundred fruits over a season, a steady bowlful every few days at the peak. Larger-fruited varieties give you far fewer, maybe ten to twenty decent tomatoes per plant in a pot. It’s why cherry types are the standard advice for balconies.
Can I grow tomatoes in a pot indoors on a windowsill?
Micro dwarf varieties can fruit on a very bright windowsill, but a normal indoor window rarely delivers enough light for more than a handful of fruit. If the plant gets leggy and pale, that’s the light budget talking. A balcony, even a small one, beats a windowsill almost every time.
Why are my tomato flowers falling off without making fruit?
Usually heat stress, drought stress, or lack of pollination. Keep the watering steady and give the flowering stems a gentle shake every day or two, which does the job bees would do. Flower drop during a heatwave is normal and fixes itself when temperatures ease.
What’s the black leathery patch on the bottom of my tomatoes?
Blossom end rot. It’s a calcium delivery problem caused almost every time by uneven watering rather than a lack of calcium in the soil. Affected fruit won’t recover, so pick it off, then fix the watering rhythm. New fruit should come through clean. Mulch and bigger pots both help a lot.
Do I need to grow tomatoes from seed to get good ones?
Not at all. A garden center seedling of a good patio variety gives you 95 percent of the experience with half the effort. Seeds make sense in year two if you get hooked and want specific varieties, and by then you’ll know your balcony’s quirks.