
If you want to clean an oven without oven cleaner, baking soda paste is the method that actually works, and it doesn’t fill your kitchen with fumes that make your eyes water. Most oven cleaners are aerosol sprays packed with lye or other harsh chemicals that need serious ventilation, gloves, and a face turned away while you spray. Baking soda does the same job slower, but it does it while you sleep, which honestly feels like cheating.
This method works because baking soda is mildly abrasive and alkaline. It breaks down grease and carbon buildup without eating through enamel or damaging the oven’s interior coating. The catch is patience. This isn’t a five-minute fix. It’s a “leave it overnight and let chemistry do the work” fix, and that’s exactly why it beats scrubbing on your hands and knees for an hour.
What You’ll Need
- Baking soda (about half a cup for a standard oven)
- Water
- White vinegar in a spray bottle
- A bowl for mixing
- Rubber gloves
- A damp cloth or sponge
- A plastic scraper or old spatula (optional, for stubborn spots)
That’s it. No specialty products, nothing you need to order online.
Step 1: Take Everything Out
Pull the racks out first. You’ll clean these separately, either soaking them in the bathtub with hot soapy water or scrubbing them at the sink. Racks with heavy carbon buildup sometimes need a few hours of soaking before the grime lifts easily.
With the racks out, take a look at the interior. If there’s loose debris or crumbs sitting on the bottom, sweep or vacuum them out now. There’s no point mixing paste on top of a pile of burnt crumbs.
Step 2: Mix the Baking Soda Paste
In your bowl, combine baking soda with just enough water to form a spreadable paste, something like the consistency of frosting. Start with less water than you think you need. You can always add a splash more, but a paste that’s too runny just slides down the walls of the oven instead of sticking where the grease is.
A rough ratio that works well: three parts baking soda to one part water. Mix it right before you plan to apply it, since it can dry out if it sits too long in the bowl.
Step 3: Spread It Everywhere Except the Heating Elements
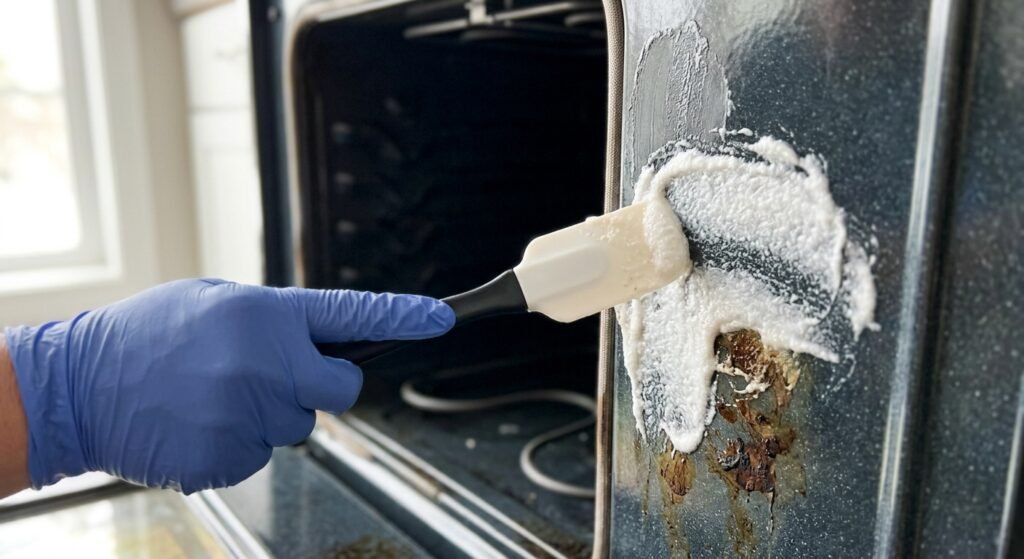
Put on the gloves and spread the paste across the interior surfaces of the oven: the bottom, sides, back wall, and inside of the door glass if it’s grimy. Focus extra paste on any dark, crusty patches where food has burned on.
This is the part that needs a real safety note: keep the paste away from any exposed heating elements and away from gas ports or pilot lights. If you have a gas oven, check where the igniter and gas openings sit before you start smearing paste anywhere near them. You want the paste on the walls and floor of the cavity, not gumming up parts that need to stay clear to work safely.
Once it’s spread, close the door and walk away. Overnight, roughly 12 hours, is the sweet spot. Even a few hours helps if you’re short on time, but the baked-on stuff softens a lot more with a full overnight sit.
Step 4: Wipe It Out
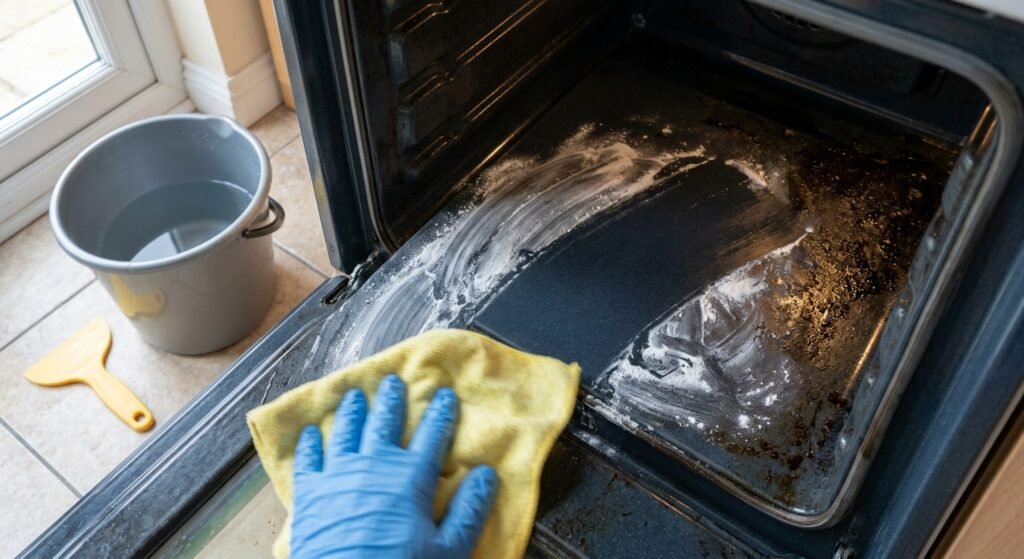
The next day, the paste will have dried into a slightly crusty, grayish layer, and underneath it the grease will have loosened its grip. Take a damp cloth and start wiping. Most of it comes away in satisfying chunks and streaks. For the areas that resist, a plastic scraper held at a low angle lifts the paste and grime together without scratching the interior finish. Never use metal scrapers or steel wool on an oven’s coated interior, since they can strip the finish permanently.
You’ll probably need to rinse and re-wipe your cloth several times. This part takes a bit of patience, especially in the corners where paste tends to pool.
Step 5: Spray with Vinegar for the Final Pass
Once most of the paste and grime is off, spray the interior lightly with white vinegar. It fizzes on contact with any remaining baking soda residue, which actually helps lift the last bit of film. Wipe again with a clean, damp cloth until the surfaces feel smooth rather than gritty.
Don’t mix baking soda paste directly with vinegar expecting a more powerful cleaner. The fizzing reaction neutralizes both ingredients almost instantly, so combining them in a bowl before application just gives you salty water with no real cleaning punch left. Use the vinegar as a separate final rinse step, not mixed in with the paste itself.
Step 6: Deal With the Door Glass Separately
Oven door glass often has a layer of baked-on grease sandwiched right at the front where you can see it every time you walk past. The same paste method works here. Spread a thicker layer on the glass, let it sit for a couple of hours (it doesn’t need the full overnight since glass isn’t porous), then wipe clean. For stubborn spots, a razor blade scraper held flat against the glass, not the interior enamel, can shave off crusted residue safely.
A Few Extra Tips
- If your oven has a serious buildup that’s been ignored for months or years, expect to repeat the whole process twice. One pass usually handles moderate grime, but heavy buildup sometimes needs a second overnight treatment.
- Always let the oven cool completely and keep it switched off during the entire process. Never apply paste to a warm oven, both because it’s a burn risk and because the paste dries out too fast to work.
- Once your oven is clean, wiping up spills right after they happen (once the oven’s cooled, of course) keeps you from needing this deep clean as often.
- The same baking soda paste trick works on other stubborn kitchen messes too. If you’ve ever dealt with cleaning a burnt pot, you already know how well this basic method transfers.
Why This Beats Store-Bought Oven Cleaner
Aerosol oven cleaners work fast, sometimes in as little as 20 minutes, but the tradeoff is real. The fumes are strong enough that most labels tell you to ventilate the room and avoid breathing them in, which is hard to do in a small apartment kitchen. They’re also rough on your hands and any nearby surfaces if overspray drifts. Baking soda paste takes longer, but it’s genuinely gentle enough to use in a home with kids, pets, or just a sensitive nose, and it costs a fraction of the price.
If your appliance troubles extend past the oven, the same non-toxic, patience-over-chemicals approach applies elsewhere in the kitchen. Grease buildup on stainless steel appliances or on painted cabinets near the stove responds to gentler methods too, so you’re not reaching for harsh chemicals all over your kitchen.
FAQs
Will baking soda damage my oven’s interior?
No, it’s actually one of the gentlest things you can use. Baking soda is mildly abrasive, similar to a soft scouring powder, so it won’t scratch enamel or damage a self-cleaning oven’s coating the way steel wool or harsh chemical cleaners can. Just avoid using metal scrapers alongside it.
How long does the paste need to sit?
Overnight works best, somewhere around 10 to 12 hours. If you’re in a hurry, even 2 to 3 hours will loosen some grime, but really baked-on spots need the longer soak to fully soften.
Can I use this method on a self-cleaning oven?
Yes, though if your oven has a proper self-clean cycle, you might just run that instead for heavy buildup. That said, plenty of people prefer the baking soda method anyway since self-clean cycles get extremely hot, can trigger smoke alarms, and sometimes leave a burnt smell for days. Baking soda is the gentler, quieter alternative.
What if there’s a strong burnt smell after I clean it?
Run the oven empty at a low temperature, around 200°F (95°C), for 20 to 30 minutes with the kitchen fan on and a window cracked. This burns off any leftover residue and clears the smell before you cook in it again.
Is it safe to clean the oven door glass with this method?
Yes, just give it a slightly shorter sit time since glass isn’t porous like enamel. A couple of hours is usually plenty, and a razor blade scraper handles anything the paste doesn’t fully lift, as long as you use it flat against the glass.