
To clean grease off stainless steel without streaks, you need two separate steps, and skipping the second one is why most people end up with smears. First, cut the grease with warm water and dish soap on a microfiber cloth, wiping in the direction of the grain. Then rinse with a clean damp cloth and immediately buff dry with a second, completely dry microfiber cloth, again with the grain. Streaks aren’t a stainless steel problem. They’re a residue problem, leftover soap, leftover grease, or leftover water that dried on its own.
The greasy film on a fridge door or range hood is cooking oil that went airborne, settled, and mixed with dust. It’s sticky, it grabs fingerprints, and glass cleaner alone just smears it around in shiny arcs. Dish soap is the right tool because it’s literally designed to break down cooking grease, and it’s gentle enough for every stainless finish.
Why Stainless Steel Streaks So Easily
Stainless steel has a brushed grain, fine parallel lines from manufacturing. Wipe across the grain and you drag residue into every tiny groove, where it sits and catches the light. Wipe with the grain and the same pass actually clears the grooves. Find the grain first: look closely and you’ll see the lines run either horizontally or vertically, and they can differ between the door and the handle on the same fridge.
The second cause of streaks is product buildup. Oily “stainless steel polish” sprays layer up over weeks until the surface looks permanently smudged, and then even a clean wipe streaks. If your appliance always looks filmy no matter what, the first job is stripping old product off with soapy water, not adding more polish.
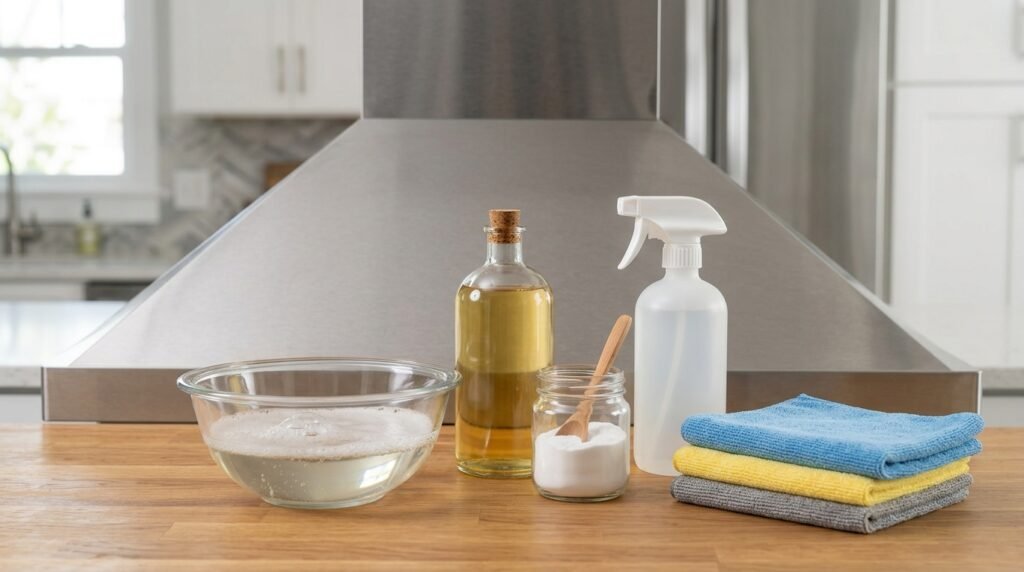
What You’ll Need
- Dish soap
- Warm water
- Three microfiber cloths: one to wash, one to rinse, one strictly for dry buffing
- White vinegar in a spray bottle for the degreased shine pass
- Baking soda for baked-on grease spots
- Optional: a drop of mineral oil or a stainless conditioner for the final protective sheen
That’s really it. Paper towels shed lint and can leave fine swirl marks, so keep them out of this job.
How to Clean Grease Off Stainless Steel: The No-Streak Method
- Find the grain. Ten seconds of looking saves the whole result. Every wipe from here on follows those lines.
- Wash with soapy water. A few drops of dish soap in a bowl of warm water. Wring the cloth so it’s damp, not dripping, and wipe with the grain using long, overlapping strokes. On a range hood or the panel above the stove, you may need two or three passes, and the cloth will visibly yellow. That’s the grease leaving, so rinse the cloth and keep going until it wipes clean.
- Tackle stuck-on spots with baking soda. For grease that’s baked on near the cooktop, make a paste of baking soda and water, rub it gently with the grain using the cloth, and let it sit a minute before wiping. It lifts polymerized grease without scratching. Don’t use scouring pads, ever.
- Rinse. Wipe the whole surface with the second cloth wrung out in plain water. This removes soap residue, and soap residue is streak fuel.
- Buff dry immediately. Take the dry cloth and buff with the grain until the surface squeaks slightly. Work in sections on a big fridge door so nothing air-dries. This step is 90 percent of the streak-free result, and it takes less time than it sounds.
- Optional vinegar pass for extra shine. Mist a little white vinegar onto the cloth (not directly onto the appliance, to keep it out of seams and vents), wipe with the grain, and buff dry. Vinegar flashes off fast and cuts any last trace of film. One caution: never use vinegar in the same session as any bleach-based cleaner, since the combination gives off toxic chlorine gas.
- Optional protective coat. A single drop of mineral oil on the buffing cloth, spread thin with the grain, makes the steel glow and helps future fingerprints wipe off in one pass. Use barely any. Too much and you’ve recreated the smudge problem you started with.
Quick Daily Version
For everyday fingerprints and light film: damp microfiber wipe with the grain, dry microfiber buff. Thirty seconds per appliance. If you do this a couple of times a week, the full degrease above becomes a monthly job at most.
What NOT to Do
- Don’t use anything abrasive. Steel wool, scouring pads, and gritty cleansers scratch the grain permanently, and steel wool can leave particles that later rust in place.
- Don’t use bleach or chloride cleaners. Chlorides actually corrode stainless steel and can cause pitting. Check labels, because plenty of bathroom sprays contain them.
- Don’t use oven cleaner on exterior panels. It’s far too harsh and can discolor the finish in one application.
- Don’t spray liquid directly at control panels and seams. Mist the cloth instead. Moisture in an ignition switch or display is an expensive mistake.
- Don’t wipe in circles. Circular wiping across the grain is the classic streak-maker, and on cheaper appliances it can leave visible swirl scuffs over time.
- Don’t layer polish over dirt. Stainless polish on top of a greasy surface just seals the grease in and looks worse in a week. Degrease first, always.
Don’t Forget Where the Grease Came From

The film on your fridge doesn’t appear in isolation. Airborne cooking grease settles on everything within a couple of meters of the stove, so while the soapy water is out, hit the range hood filter (most are dishwasher safe), the backsplash, and the cabinet doors flanking the cooker. Painted cabinets need a slightly different, gentler approach so you don’t lift the finish, and we’ve written that up here: How to Get Cooking Grease Off Painted Cabinets.
Running the extractor fan every single time you fry, even for quick jobs, cuts the settling grease dramatically. So does putting a lid or splatter screen over anything that spits. The difference between a kitchen that needs degreasing monthly and one that needs it twice a year mostly comes down to those two habits.
If your appliances have price sticker remnants or tape marks still clinging on from delivery, the safe removal method is different from degreasing: How to Remove Sticker Residue from Wood covers the gentle solvent approach that works on appliance panels too.
FAQs
What is the best homemade degreaser for stainless steel?
Warm water with dish soap. It sounds too simple, but dish soap exists to dissolve cooking grease and it won’t harm any stainless finish. For stuck-on spots, a baking soda paste adds gentle scrubbing power. Follow either one with a plain water wipe and a dry buff and you’ll beat most commercial sprays.
Why does my stainless steel fridge look worse after I clean it?
Almost always residue. Either soap that never got rinsed off, a polish spray that’s built up in layers, or wiping across the grain instead of with it. Strip everything back with soapy water, rinse with a clean damp cloth, then buff completely dry with the grain. If it’s been “polished” weekly for months, that strip-back might take two rounds.
Can I use vinegar on stainless steel appliances?
Yes, and it’s great as a final shine pass after degreasing. Spray it on the cloth rather than the appliance, wipe with the grain, and buff dry. Don’t leave it sitting in seams, and never use it alongside bleach products. A few manufacturers advise against vinegar on certain coated “fingerprint-resistant” finishes, so check your manual if yours has one.
How do I get sticky yellow grease film off the top of my fridge?
That layer of grease mixed with dust is genuinely stubborn. Lay a warm, very soapy cloth on it for a few minutes to soften it first, then wipe. Expect to rinse the cloth several times, and this part takes patience the first time. Once it’s clean, a sheet of cling film or newspaper laid on top makes the next clean a lift-and-replace job.
Do fingerprint-resistant stainless appliances need different cleaning?
They have a clear coating over the steel, so be gentler: soapy water and microfiber only, no vinegar, no baking soda paste, no polishes unless the manual approves them. The coating does the shine work for you, and harsh products can cloud it permanently.
Pingback: How to Get Cooking Grease Off Painted Cabinets Without Ruining the Paint - The Home Perk