
A drip every few seconds doesn’t sound like much, but it adds up fast, both in wasted water and in the sound driving you slightly insane at 2 a.m. You can fix a dripping faucet yourself in most cases, usually in under an hour, and the parts involved cost a few dollars rather than requiring a plumber’s visit. The exact fix depends on what kind of faucet you have, but the general troubleshooting process is the same everywhere.
Before anything else: if you’re renting, check your lease or ping your landlord first. Some leases specify that plumbing repairs go through the landlord or building maintenance, and a botched DIY fix can sometimes cost you more than the drip ever would. That said, plenty of small faucet repairs are simple enough that landlords are happy to have a tenant handle them, especially if you mention it first.
Step 1: Shut Off the Water
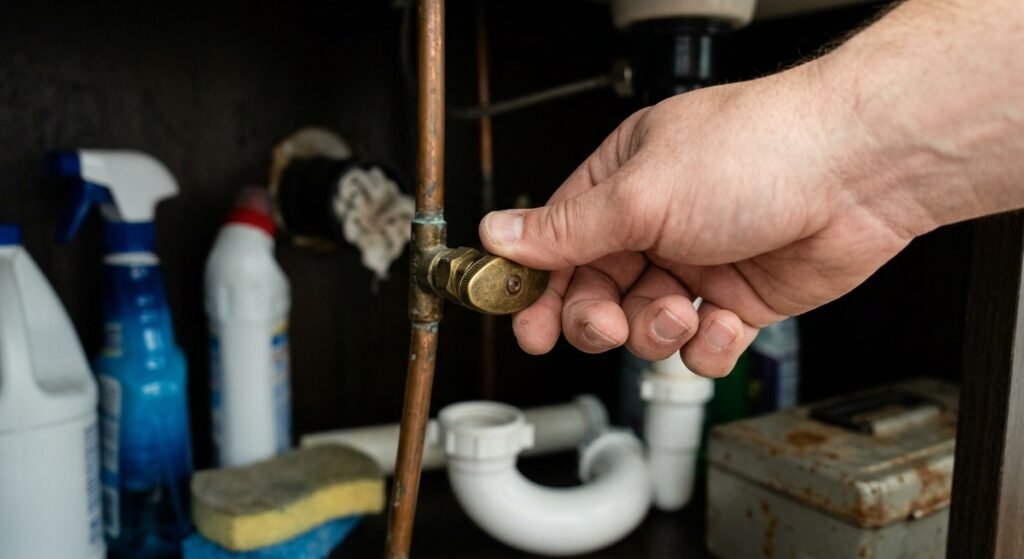
This is non-negotiable. Look under the sink for two small valves, one for hot and one for cold, usually with a round or oval handle. Turn both clockwise until they stop. Then turn on the faucet to drain any remaining water in the lines and confirm the water’s actually off.
If there are no shutoff valves under your sink (older buildings sometimes skip them), you’ll need to shut off the main water supply to the apartment, which is a good sign this repair might be better left to your landlord or a plumber, since it usually means older plumbing that’s easier to damage.
Plug the drain with a rag or a stopper before you start. Faucet repairs involve small parts like screws, washers, and O-rings, and losing one down the drain is a classic way to turn a 20-minute job into a much longer one.
Step 2: Figure Out What Kind of Faucet You Have
Most faucets fall into one of four categories, and knowing which one you’ve got tells you exactly what’s likely causing the drip:
- Compression faucets (older style, usually with separate hot and cold handles that you turn until they stop) use rubber washers that wear out over time. This is the most common cause of a slow drip in older bathrooms.
- Ball faucets (single handle, moves in all directions, common in kitchens) have a rotating ball with a bunch of small parts, springs, and seats. A drip here usually means worn seats or springs.
- Cartridge faucets (single or double handle, moves up and down or side to side smoothly) rely on a cartridge that wears out and needs replacing rather than repairing.
- Ceramic disc faucets (single lever, often on a wide base, feels smooth and modern) use ceramic discs that rarely wear out but can develop mineral deposits causing drips.
If you’re not sure which type you have, take the handle off (usually one screw hidden under a cap on top) and look inside. It’ll usually be obvious once you compare it to pictures of each type.
Step 3: Disassemble the Faucet
- Pop off the decorative cap on the handle with a flathead screwdriver, revealing a screw underneath.
- Remove the screw and lift the handle straight up and off.
- Depending on the type, you’ll see either a retaining nut (compression and ball faucets) or a cartridge held by a clip (cartridge faucets). Use pliers or the appropriate wrench to loosen and remove it.
- Lay the parts out in order on a towel as you go. This sounds obvious, but it’s easy to end up with a pile of small parts and no memory of which order they came out in.
Step 4: Replace the Worn Part

- Compression faucet: Pull out the stem and check the rubber washer at the bottom. If it’s cracked, flattened, or torn, that’s your drip. Take it (and the screw holding it in place, if there is one) to a hardware store to match the exact size, since washers come in several diameters and thicknesses.
- Ball faucet: These usually come with a repair kit sold specifically for the brand, containing new springs, seats, and O-rings. Replace all of them together rather than trying to identify just the one culprit.
- Cartridge faucet: Pull the old cartridge straight out (it may need a small tool or pliers to wiggle free) and bring it to the store to match a replacement, since cartridges are very brand and model specific. Push the new one in the same orientation the old one came out.
- Ceramic disc faucet: Often the fix is just cleaning mineral buildup off the disc with vinegar rather than replacing anything. If cleaning doesn’t stop the drip, the disc cartridge itself needs replacing, again matched to your specific faucet model.
Step 5: Reassemble and Test
Put everything back in the reverse order you took it apart, snug but not overtightened; cranking parts down too hard can crack ceramic components or strip threads. Turn the water supply valves back on slowly and check under the sink for any leaks around the connections before you walk away. Then run the faucet through hot and cold, on and off, a few times to confirm the drip is actually gone.
If it still drips after a proper part replacement, the issue might be higher water pressure than the new part can handle, or a problem with the valve seat itself corroding, which is a more involved repair.
When to Call the Landlord Instead
A few situations where DIY isn’t the move, especially in a rental:
- No shutoff valves under the sink, which usually points to older or shared plumbing.
- The faucet itself is old, corroded, or a full unit replacement is really what’s needed, not just a part swap. Renters generally shouldn’t replace the entire faucet; that’s a landlord or maintenance job, both because it’s often a shared fixture and because a bad install can cause leaks that damage the unit below or beside you.
- You’ve replaced the part and it’s still leaking, especially if water is leaking from somewhere other than the spout, like around the base or under the sink at the supply lines.
- Any sign of a bigger leak, water stains on the cabinet floor, or a smell of mold under the sink. That points to a problem beyond the faucet itself.
Sticking to smaller repairs is also just good renter practice generally. Our guide to easy home repairs for renters covers a bunch of similar low-risk fixes that are worth doing yourself versus ones better handed off.
A Few Extra Notes
- Take a photo of the disassembly steps as you go, especially the first time you do this. It makes reassembly much faster and reduces the odds of a part going back in wrong.
- Buy a basic faucet repair kit that matches your faucet’s brand if you can identify it; most are printed somewhere on the body or in your building’s fixture documentation.
- If your faucet has been dripping for a while, check for hard water stains that have built up in the sink or around the base, since mineral deposits often go hand in hand with a leaky faucet. Our guide on removing hard water stains from a toilet uses a similar approach that works on sinks too.
- If the bigger issue in your bathroom is actually a toilet that keeps running rather than a faucet that drips, that’s usually an even quicker fix. Check our guide on how to fix a running toilet if that’s been bugging you as well.
FAQs
How much water does a dripping faucet actually waste?
More than people expect. A faucet dripping once per second can waste several thousand gallons a year, which shows up as a noticeable bump on a water bill if you pay for utilities separately. It’s worth fixing sooner rather than later for that reason alone.
Do I need any special tools?
Not usually. A flathead and Phillips screwdriver, an adjustable wrench or pliers, and possibly a hex key depending on your handle type covers most faucet repairs. The replacement parts themselves (washers, O-rings, cartridges) are the only things you’ll need to buy.
What if I can’t find a replacement part for an old faucet?
Some very old or discontinued faucet models genuinely don’t have parts available anymore. In that case, a full faucet replacement is the only fix, which as a renter usually means it’s time to loop in your landlord rather than trying to force a mismatched part to work.
Can a dripping faucet cause any real damage if I ignore it?
Beyond the wasted water and the annoying sound, a long-term drip can stain the sink basin, contribute to mineral buildup in the drain, and in rare cases lead to a small leak developing at a weak point in the fixture. It’s a minor problem that’s genuinely easy to fix, so there’s not much reason to let it drag on.
Is it normal for a “fixed” faucet to drip a tiny bit right after I turn the water back on?
Yes, sometimes a little air in the lines causes a sputter or brief drip the first time you run the faucet after shutting off and restoring the water. If it settles within a minute or two of running the tap, that’s normal. If the drip continues steadily afterward, something in the repair needs another look.